1. Start / Pause
Starts or pauses the translation process.
Full product guide
This page combines first-launch setup, interface explanation, Game Lens, OCR preprocessing profiles, OCR language setup, beta Audio Translation, Lens Mode, model selection, Custom OpenAI-compatible Local API, session recording, and optional Real-Time TTS in one place.
Thaluna.exe.Téléchargements, Pobrane, or names with accents.C:\Thaluna\ or D:\Apps\Thaluna\.Hardware note: on very new or partially unsupported GPUs, OCR and local translation can fall back to CPU. If you need stable behavior, open Settings → Performance and set both OCR Device and Translation Device to CPU. For faster translation, use Ollama on supported local GPU hardware or OpenRouter for cloud translation.
Display scaling note: if the OCR region appears offset, Windows display scaling is usually the cause. Set the relevant monitor to 100% scaling, keep the game and Thaluna on the same monitor if possible, and re-set the capture region after restarting Thaluna. Starting from v2.8, an experimental DPI scaling fix is available in settings.
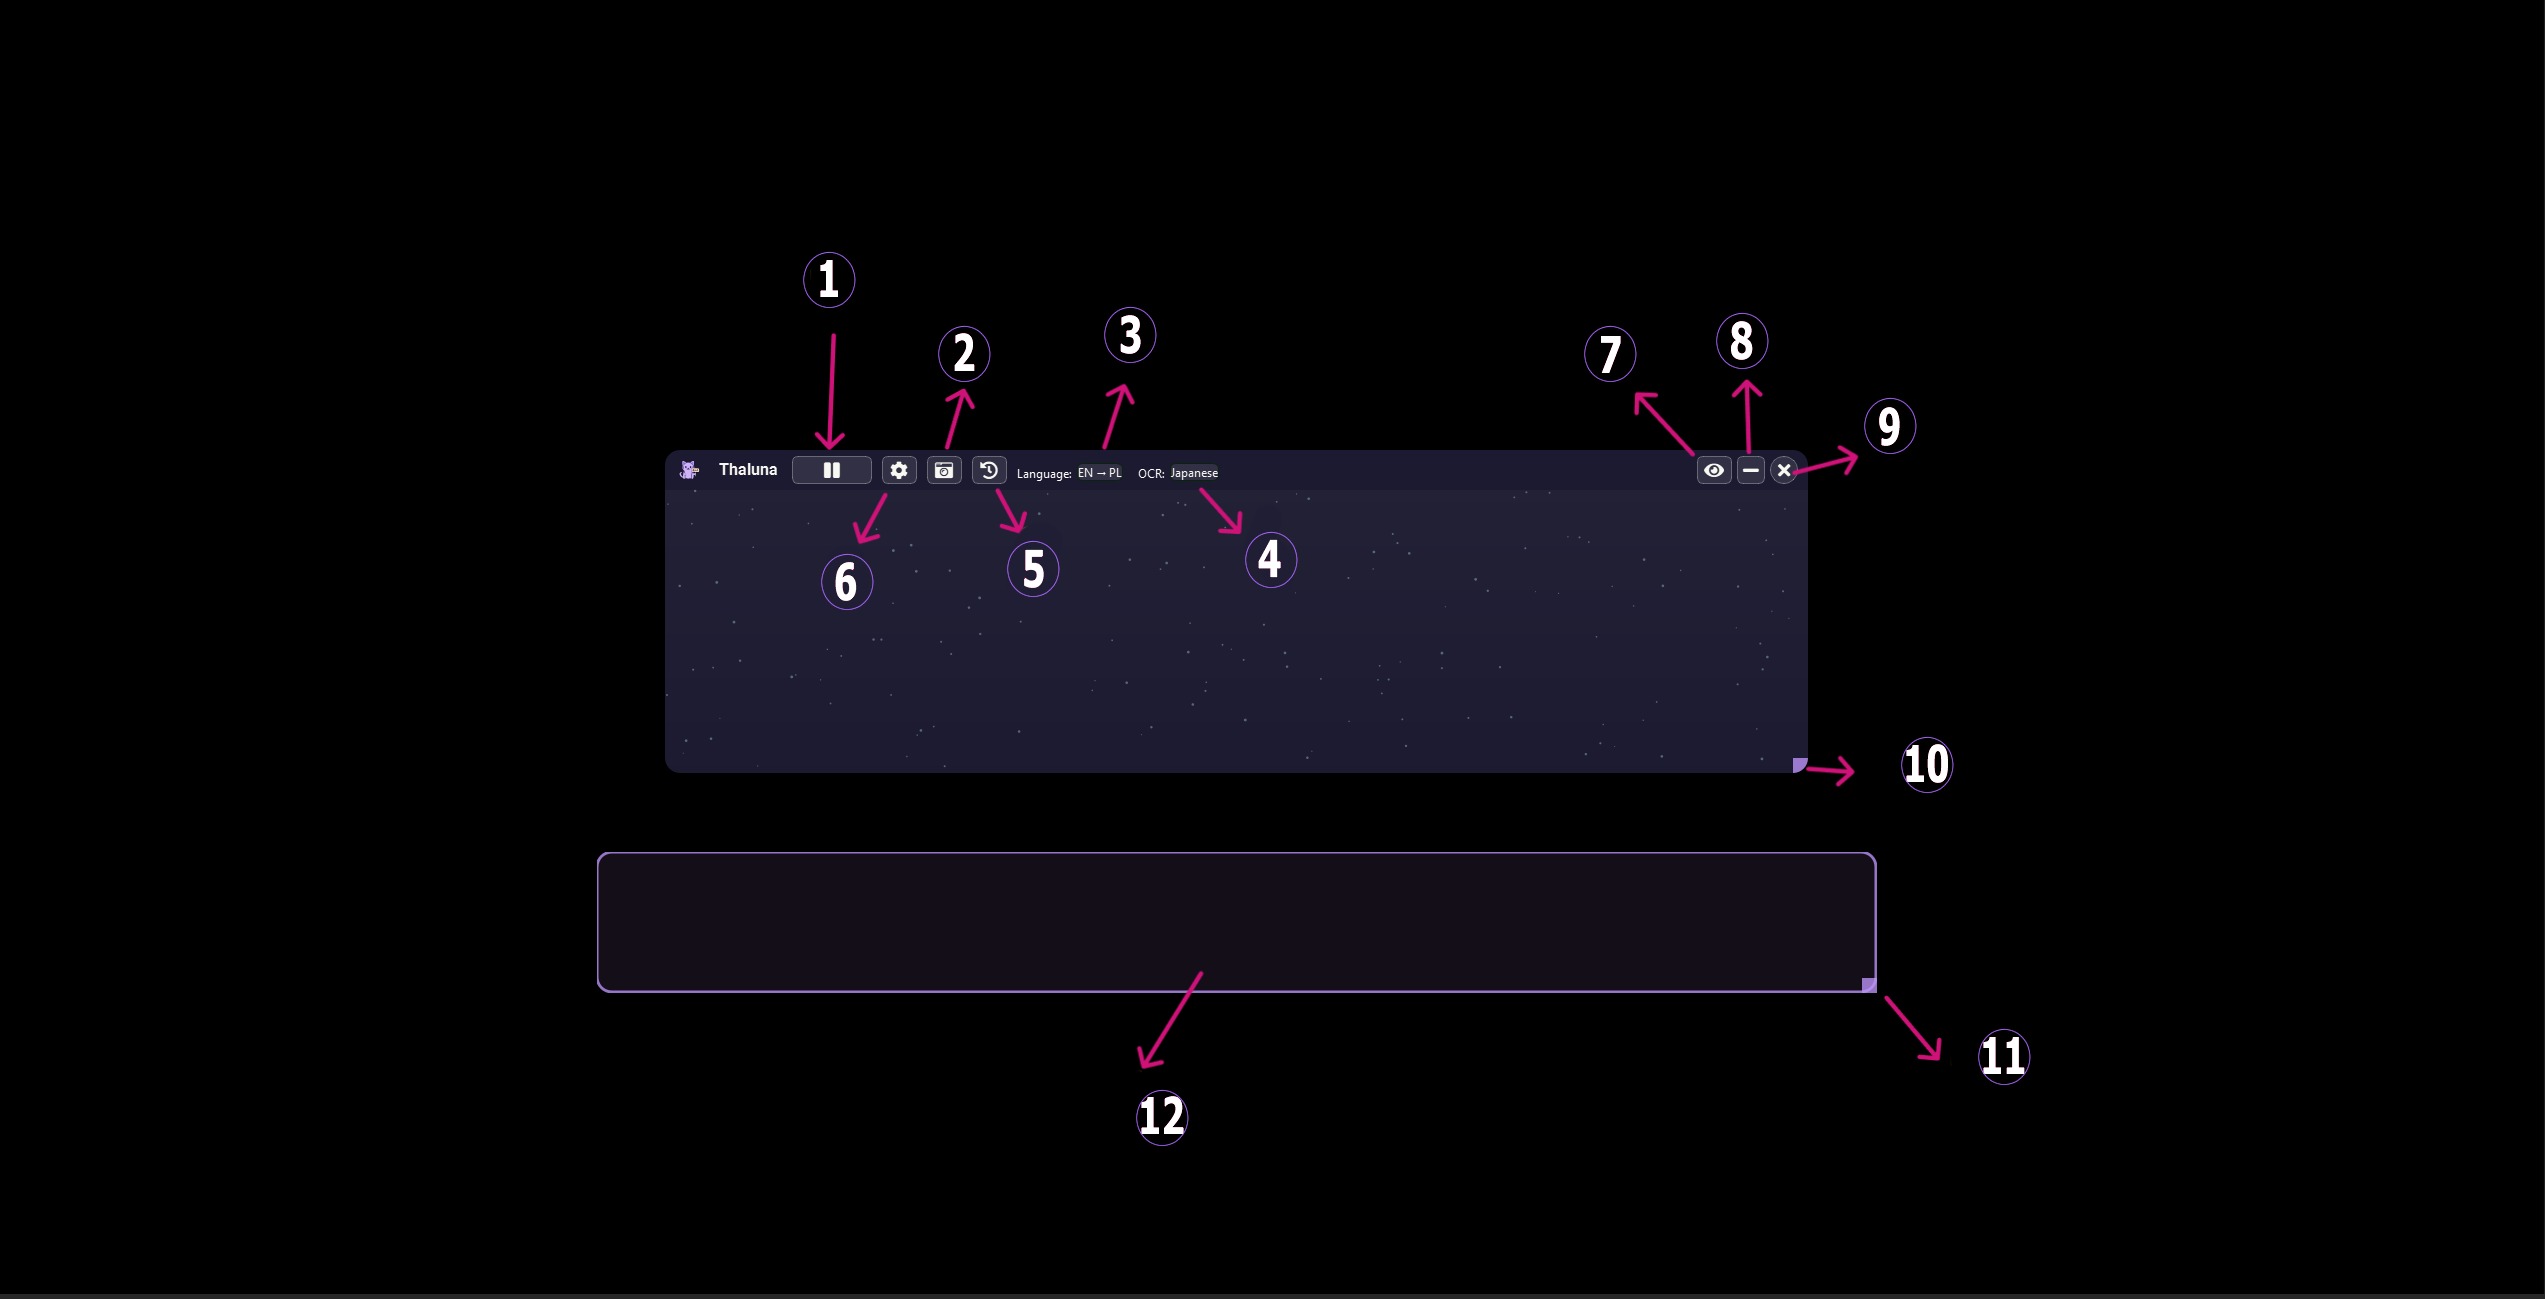
Starts or pauses the translation process.
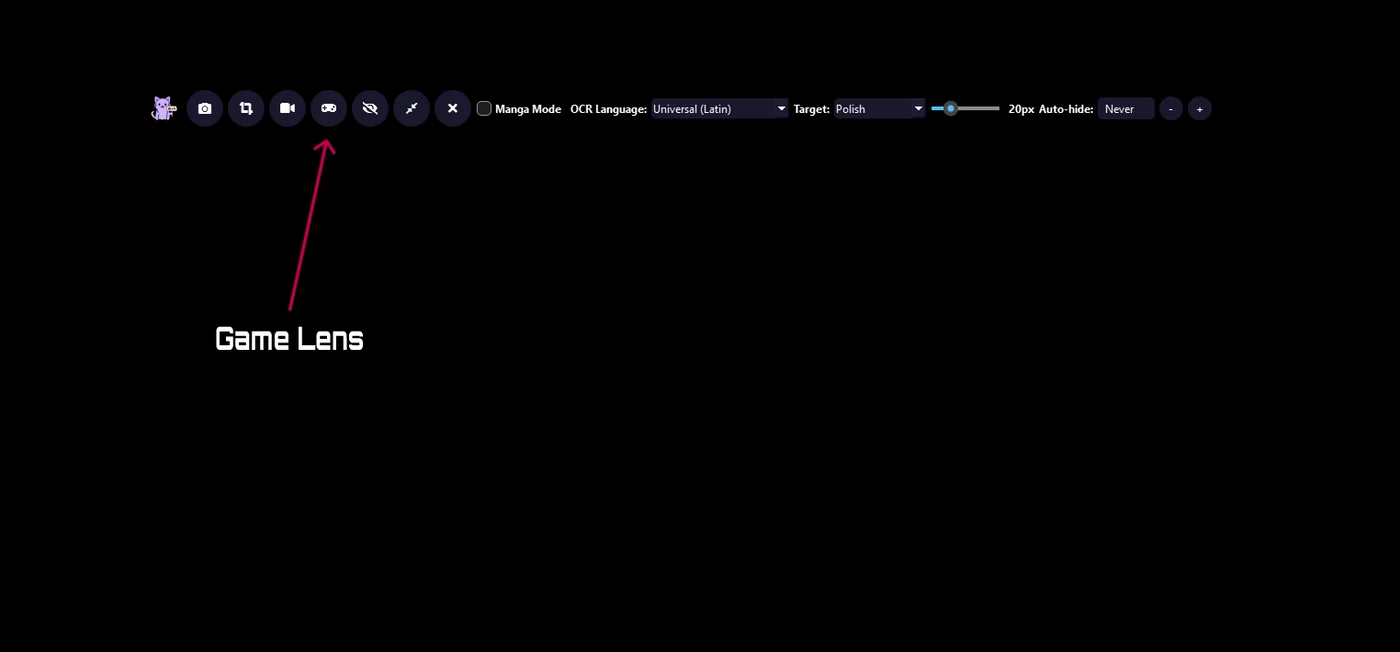
Opens Lens Mode, including Manual Lens, Continuous Lens, and Game Lens workflows.
Opens the translation backlog, similar to visual novel history.
Select the translation provider and target language.
Choose the language used for text detection.
Open the main Thaluna settings panel.
Hides the application background and leaves only subtitles visible.
Minimizes Thaluna to the taskbar.
Closes Thaluna.
Adjust the area where translated text appears.
Adjust the region Thaluna scans for text.
The screen area where Thaluna reads text from.
For detailed recommendations across OpenRouter, Ollama, KoboldCpp, llama.cpp, LM Studio, Qwen, Gemma, and built-in offline models, see the Translation Quality Guide.
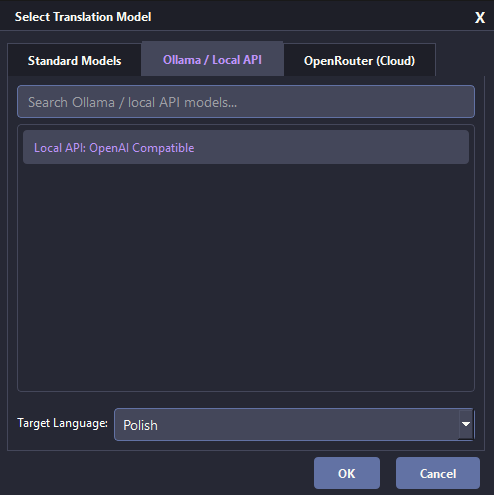
Built-in local translation models. Fast and lightweight, designed for weaker computers. Quality may be lower than larger AI models, especially for rare languages.
Allows you to use your own local models installed through Ollama.
Use a local OpenAI-compatible server such as llama.cpp, LM Studio, or another compatible endpoint.
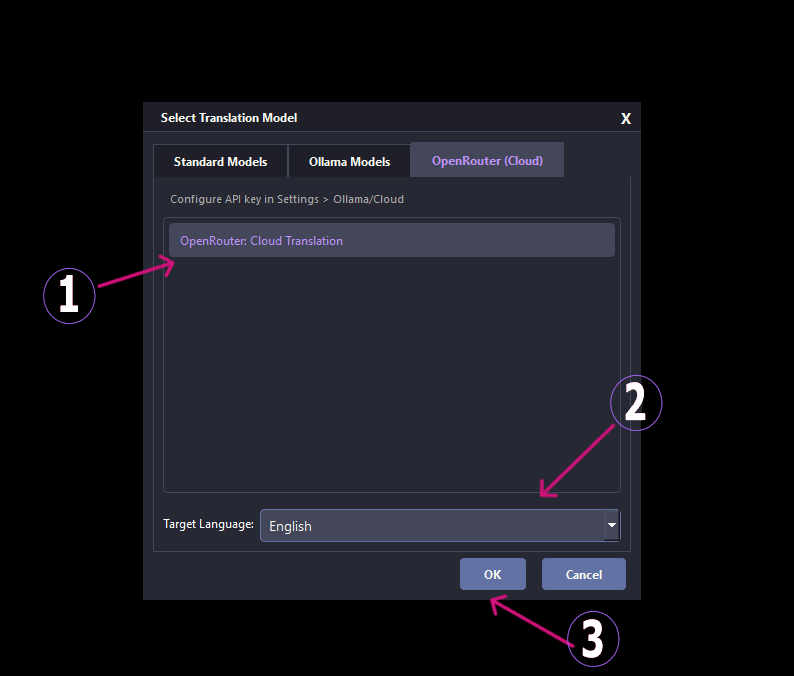
Use cloud AI models through OpenRouter for higher quality translations.
Close the window without applying changes.
Confirm the selected model and apply the settings.
Displays the available translation models for the selected category.
Choose the translation model you want to use. If you select Ollama, your installed Ollama models appear here. If you select Local API, Thaluna uses the configured OpenAI-compatible endpoint.
Select the language you want Thaluna to translate the text into.
Apply the settings and start using the selected translation model.
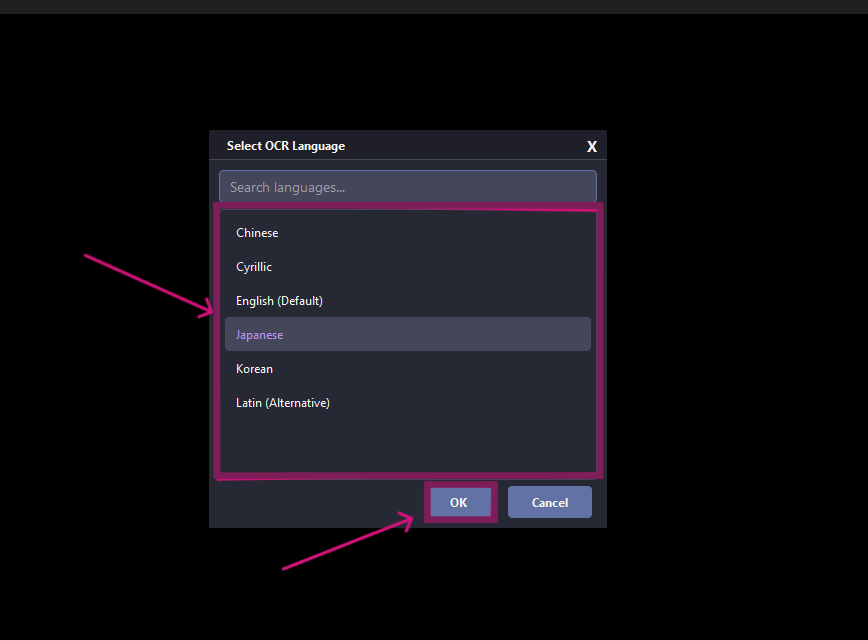
Use when the source text is written in Chinese characters.
Use for Russian, Ukrainian, Bulgarian, and other Cyrillic-based text.
Recommended for English subtitles, UI text, and most Western PC workflows.
Use for Japanese games, visual novels, manga, and anime subtitles.
Use for Korean Hangul text. Korean target translation works normally, but Korean source OCR may vary more depending on font, resolution, background, and capture region. Test your setup with the free demo when possible.
Alternative recognition path for Latin-based languages, sometimes better for stylized fonts.
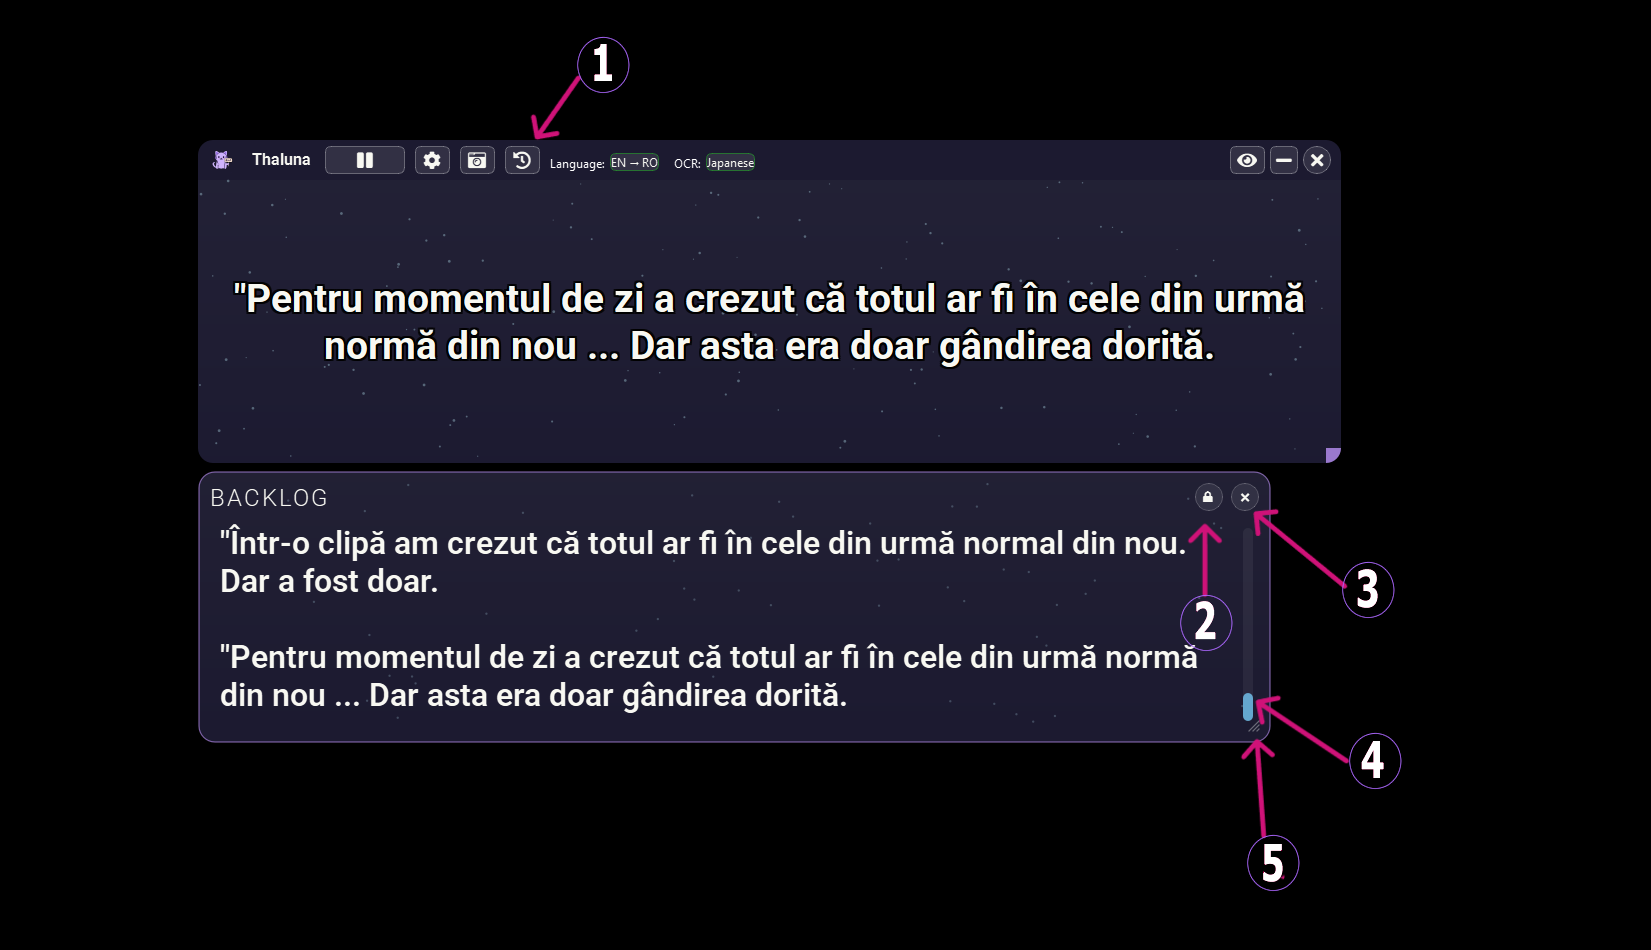
Opens the translation backlog with previously translated text.
Locks or unlocks the backlog window so you can move it freely.
Closes the backlog panel.
Scroll through previously translated lines.
Drag to increase or decrease the size of the backlog window.
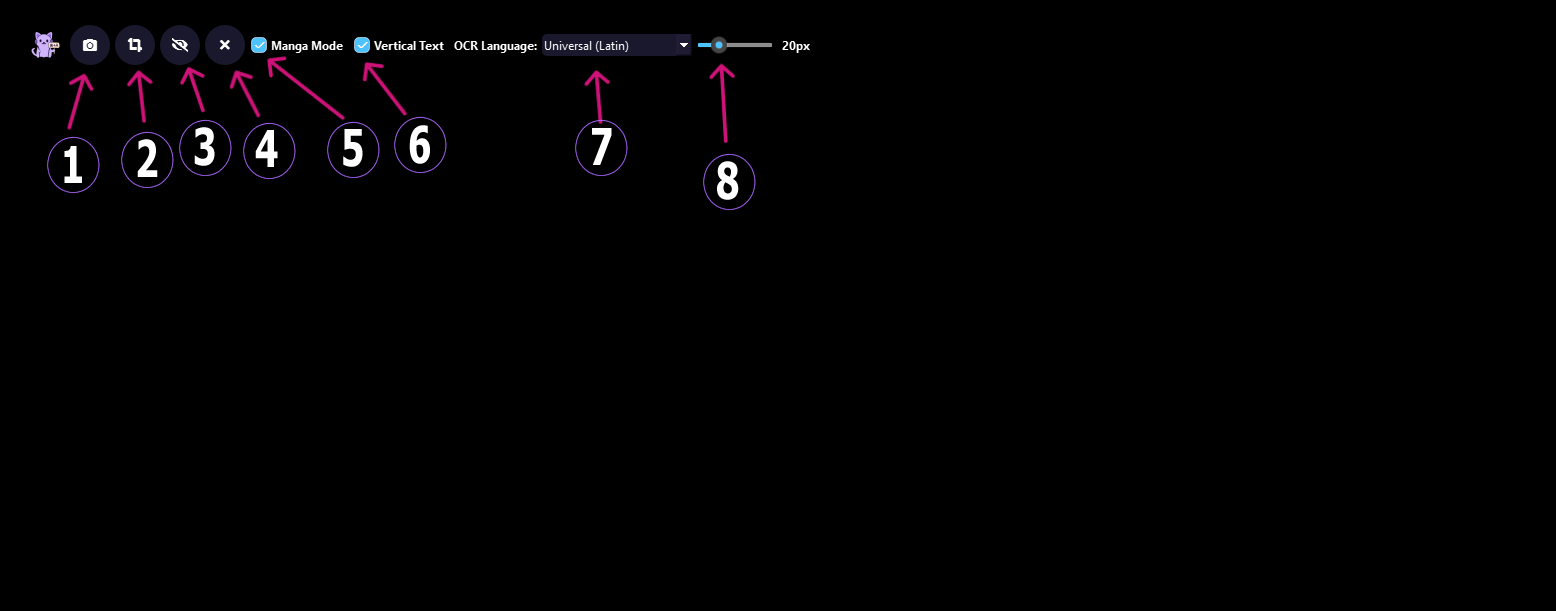
Scans the entire screen and overlays translated text wherever text is detected.
Select a specific region of the screen to scan and translate. This often improves accuracy because OCR focuses on a smaller area.
Hide or show Lens translations. In Game Lens, OCR and translation continue while overlays stay hidden, and the latest translated text appears when visibility is enabled again.
Close Lens Mode and return to the main Thaluna interface.
Improves text formatting for manga panels and speech bubbles.
Improves detection and formatting for vertical Japanese text.
Choose the language of the text you want Thaluna to detect.
Adjust the size of the translated text displayed on the screen.
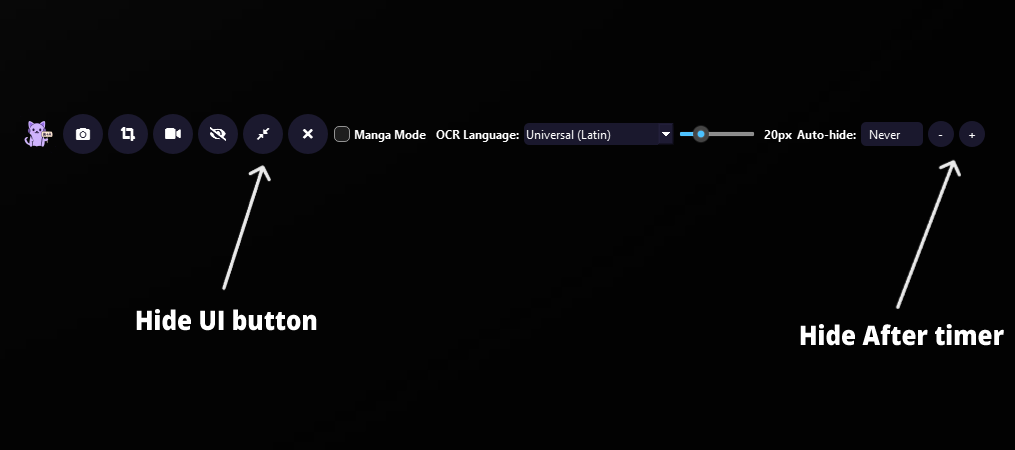
Quickly hide the Lens interface when you want only the translated overlay visible.
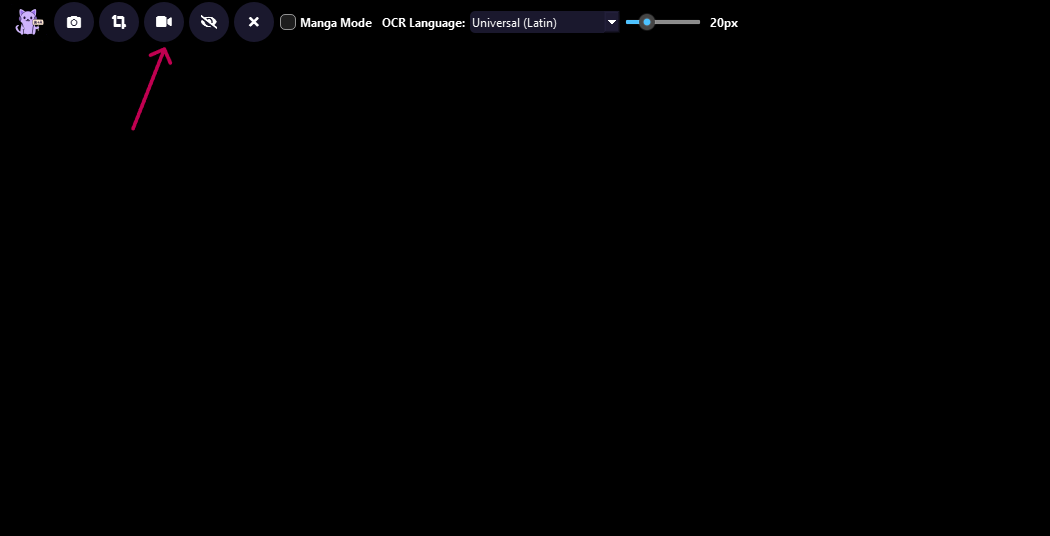
Use the game-focused Lens workflow for automatic in-place overlays, typewriter dialogue, subtitles, and game UI text.
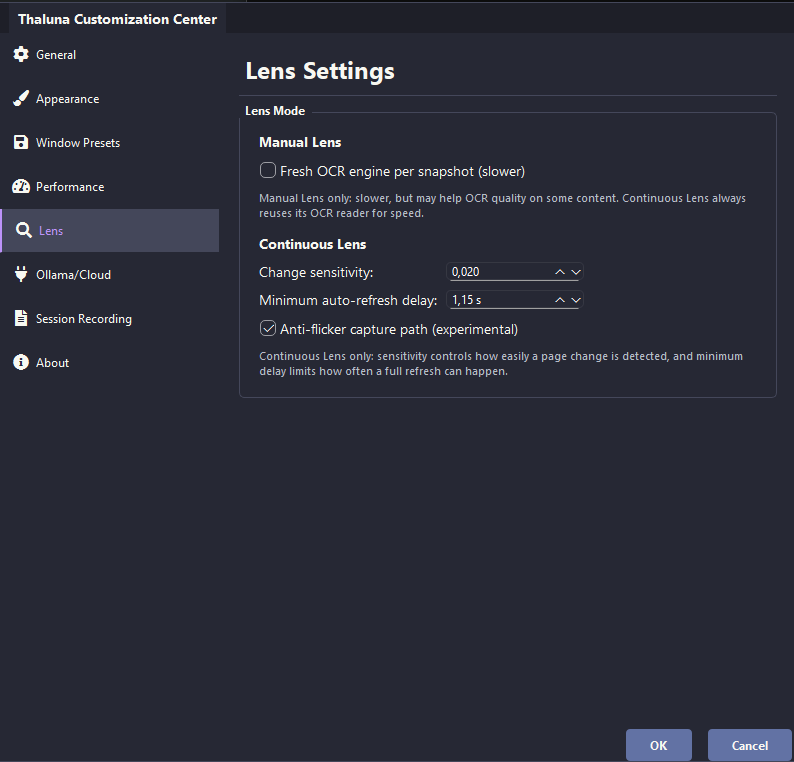
Continuous Lens removes the need to manually re-select the same area every time the content changes. It remains the best fit for manga readers, static pages, selected panels, and predictable UI regions. For games, subtitles, and scenes where the camera keeps moving or text appears slowly, use Game Lens instead.
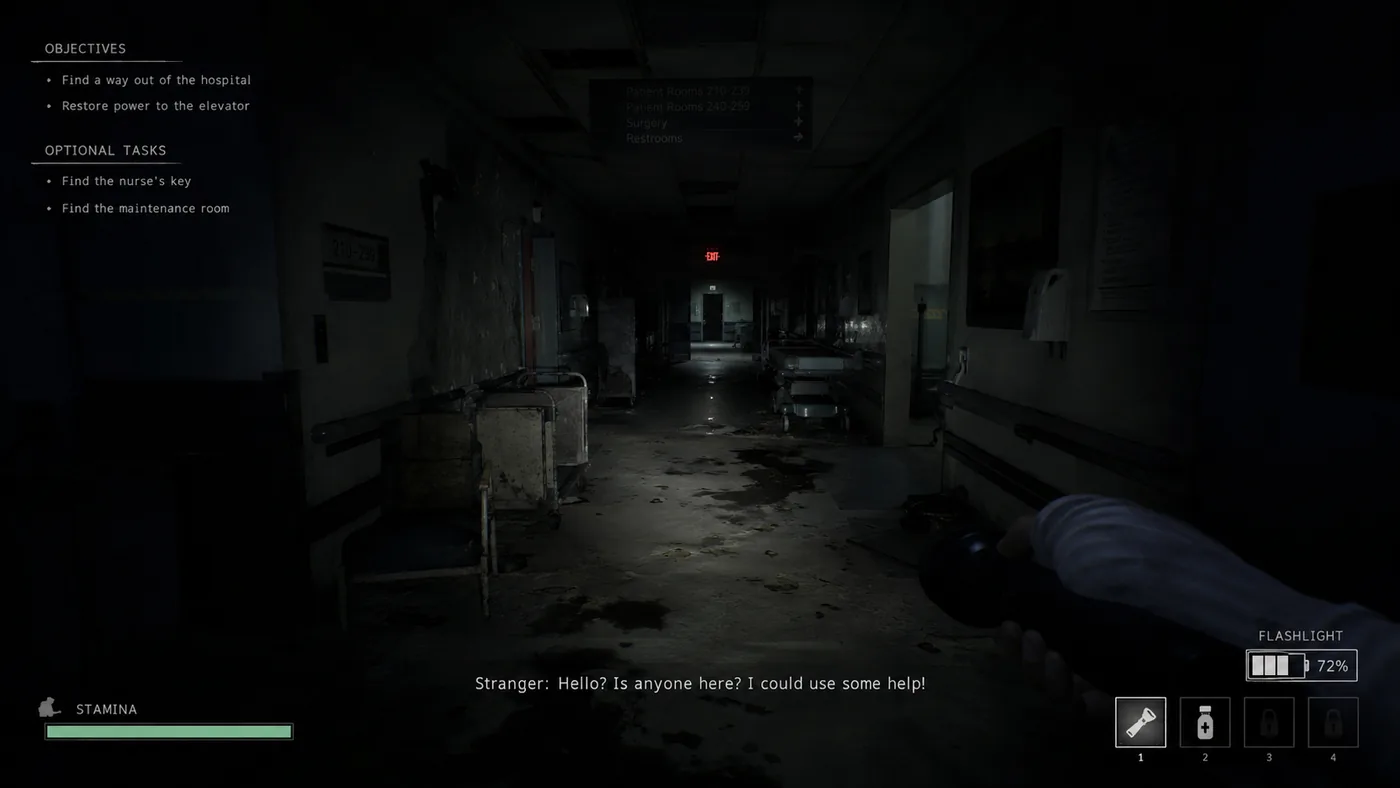
Game Lens is the Lens workflow for games, anime subtitles, and moving scenes where text changes automatically but should still be translated directly on top of the original UI.
 Original
Translated
Original
Translated
Use Game Lens for dialogue boxes, item descriptions, quest panels, menus, tutorials, signs, subtitle regions, and games where text appears inside the world or UI. It is especially useful when the text appears slowly from left to right, because Game Lens waits briefly before OCR so it does not translate only the first one or two words.
Click the Lens Mode button from the main Thaluna window. Lens Mode contains Manual Lens, Continuous Lens, Manga options, and Game Lens.
Use the dedicated Game Lens button instead of normal Continuous Lens when the target is a game, anime subtitle region, or moving scene.
Choose the area where dialogue, subtitles, item text, or UI panels appear. Smaller focused regions usually improve OCR accuracy.
For typewriter-style dialogue, wait for the line to finish appearing. Game Lens is designed to avoid translating partial text too early.
If OCR misses colored subtitles or stylized UI text, open Settings → Performance and try Auto-crop only, Light subtitles, Yellow subtitles, or Custom color.
Stop Game Lens when you leave the game, change monitor layout, or want to return to normal Real-Time OCR mode.
| Mode | Use it for | Output style |
|---|---|---|
| Real-Time OCR | Fast subtitles and dialogue when a floating translation window is enough. | Translation appears in Thaluna's real-time translation window. |
| Manual Lens | One static capture, screenshots, signs, documents, or a single manga panel. | Translated overlay is created once. |
| Continuous Lens | Manga readers, static pages, selected panels, or predictable page regions. | Selected Lens region refreshes when the content changes. |
| Game Lens | Games, anime subtitles, typewriter dialogue, item descriptions, and moving scenes. | Translated boxes stay in place while source text is visible and refresh when it changes. |
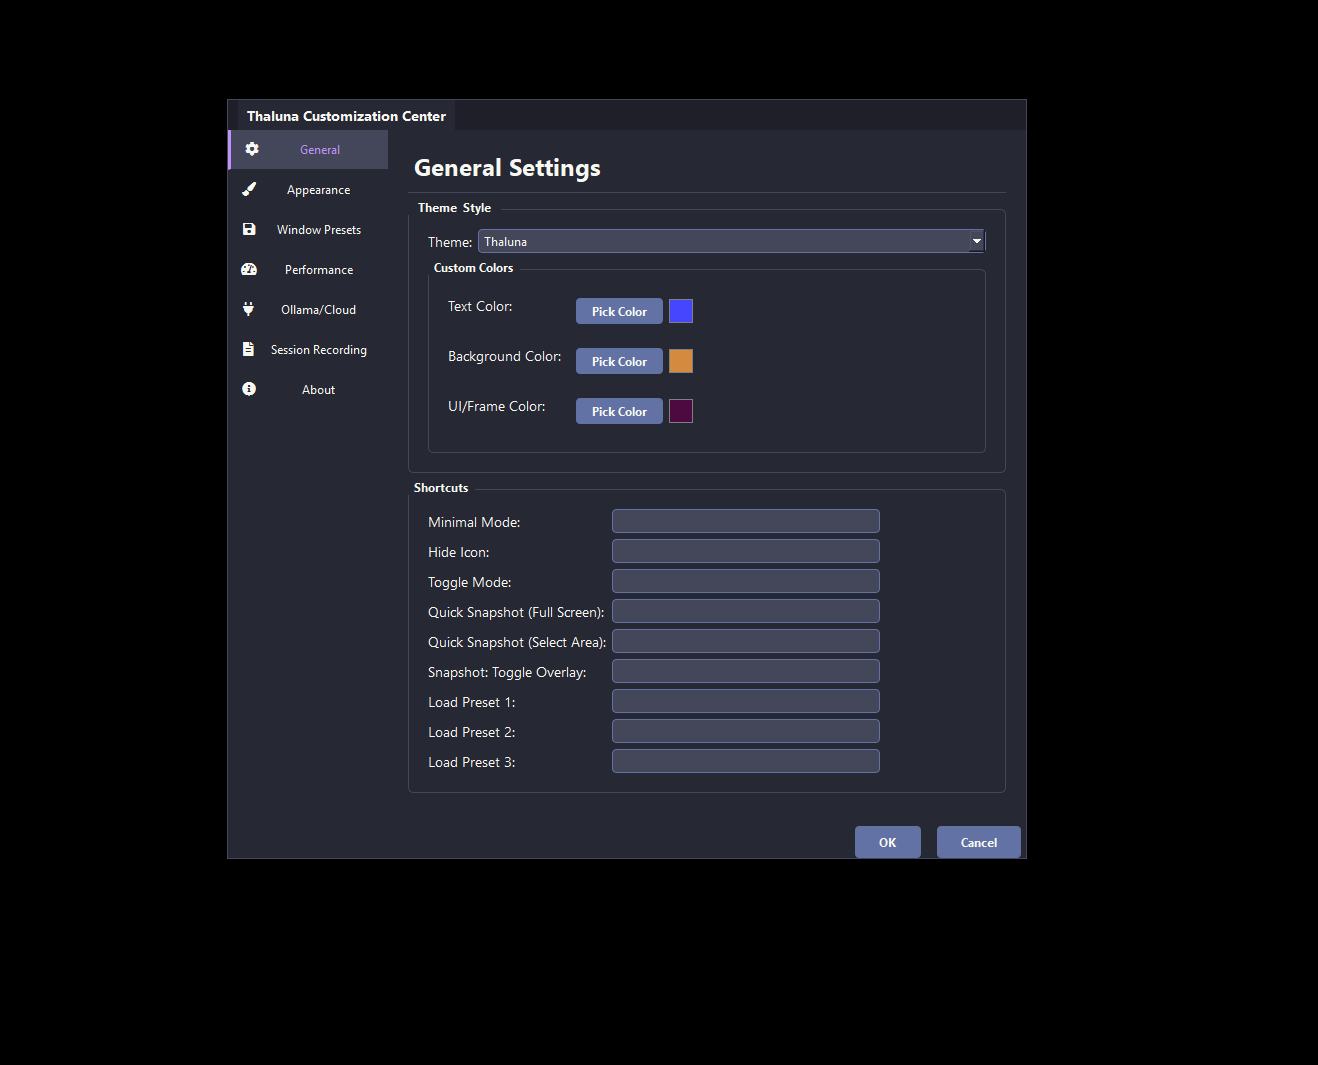
Choose a predefined theme for the real-time interface.
When Theme = Custom, adjust text color, background color, and UI/frame color for real-time mode.
Assign keys for Minimal Mode, hide icon, toggle mode, snapshots, Lens translation visibility, and preset loading.
Click a field and press the physical key or key combination. Use the clear button, Backspace, or Delete to remove it. Duplicate assignments are marked and must be resolved before saving.
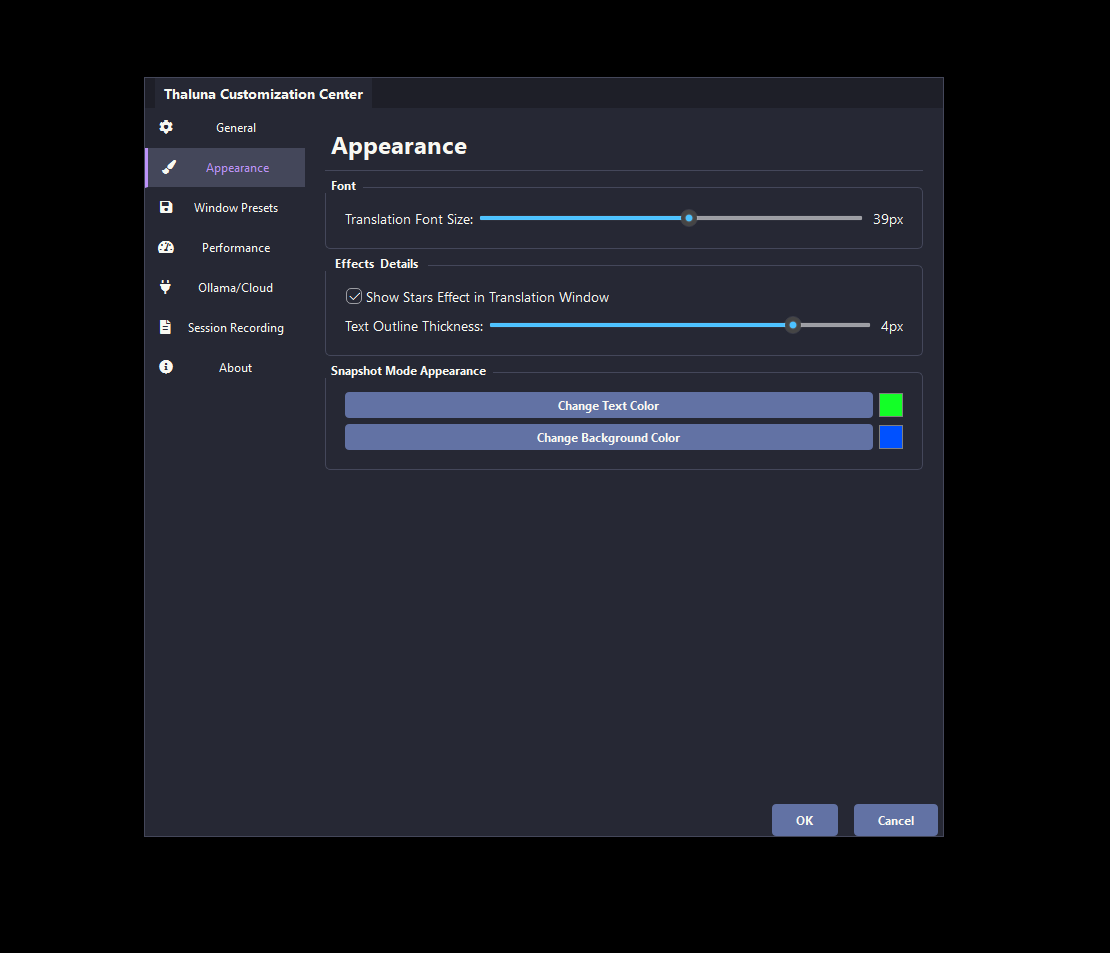
Adjust the translated subtitle size in real-time mode.
Enable or disable the animated star background effect in the translation window.
Increase outline thickness to improve readability over bright or busy backgrounds.
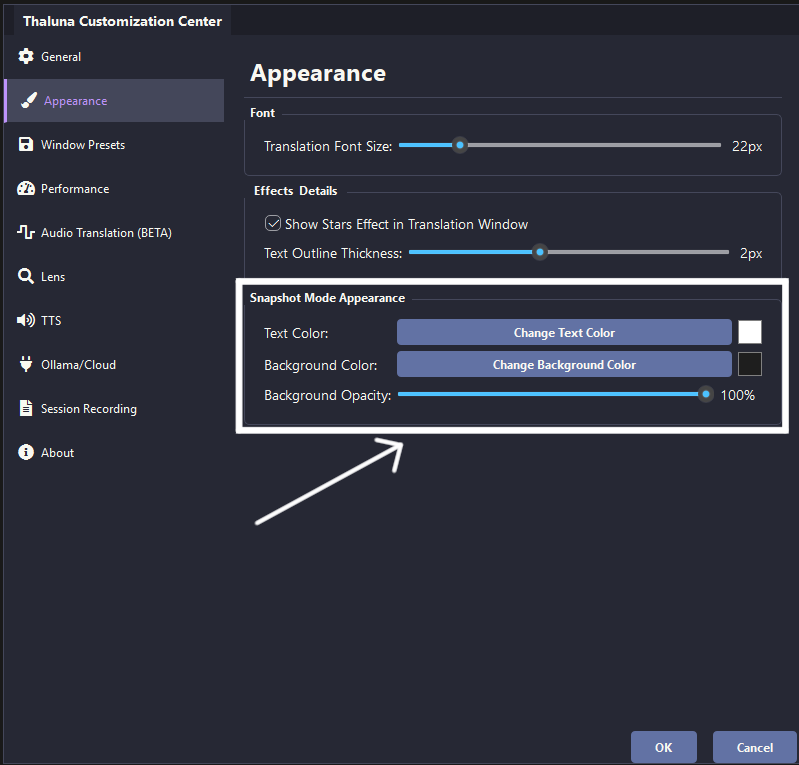
Change text color, background color, and background opacity specifically for Snapshot / Lens Mode overlays.

Set your OCR and translation windows where you want them, give the preset a name, and click Save.
Use Load to restore a saved layout instantly for the current game, video player, or monitor setup.
Presets are especially useful when you switch between different games, monitors, or media players.
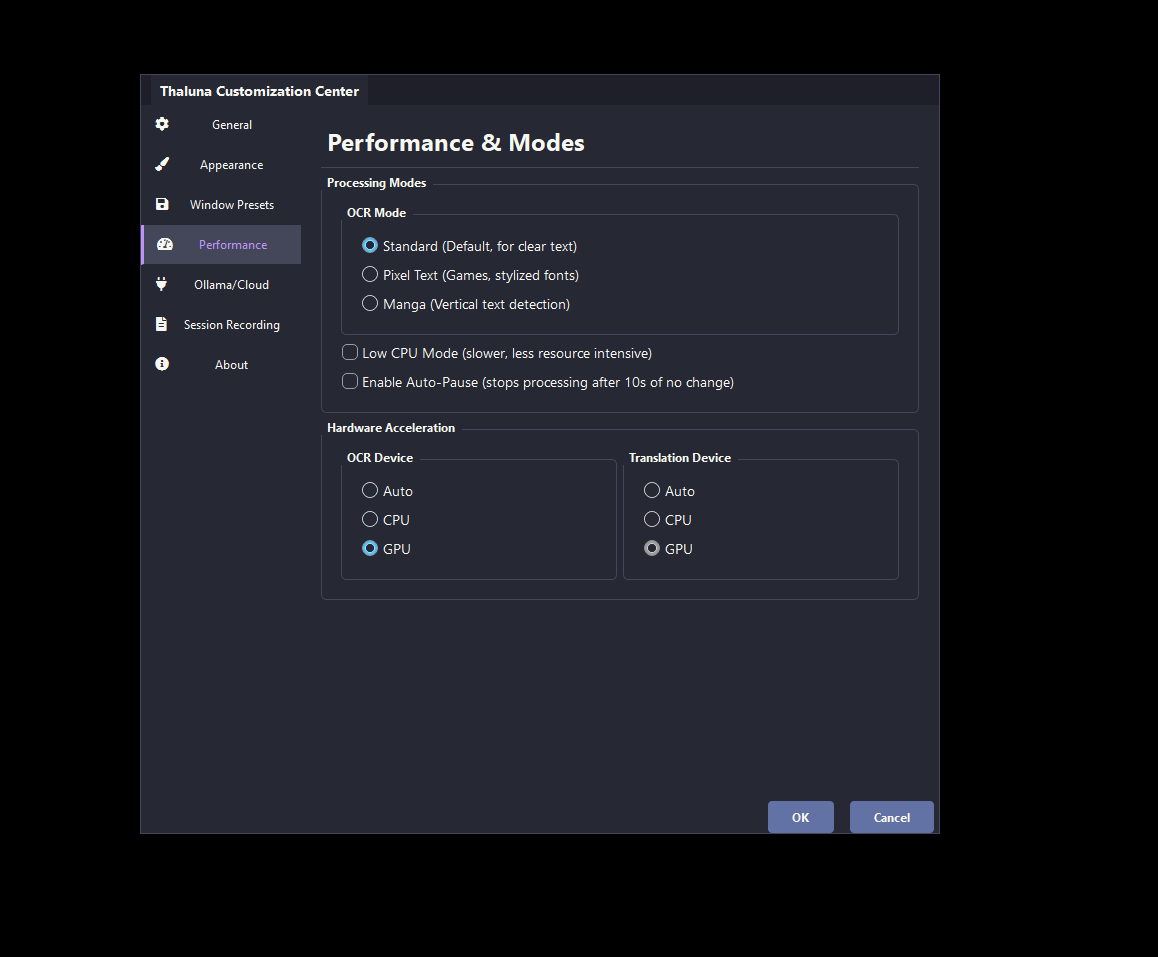
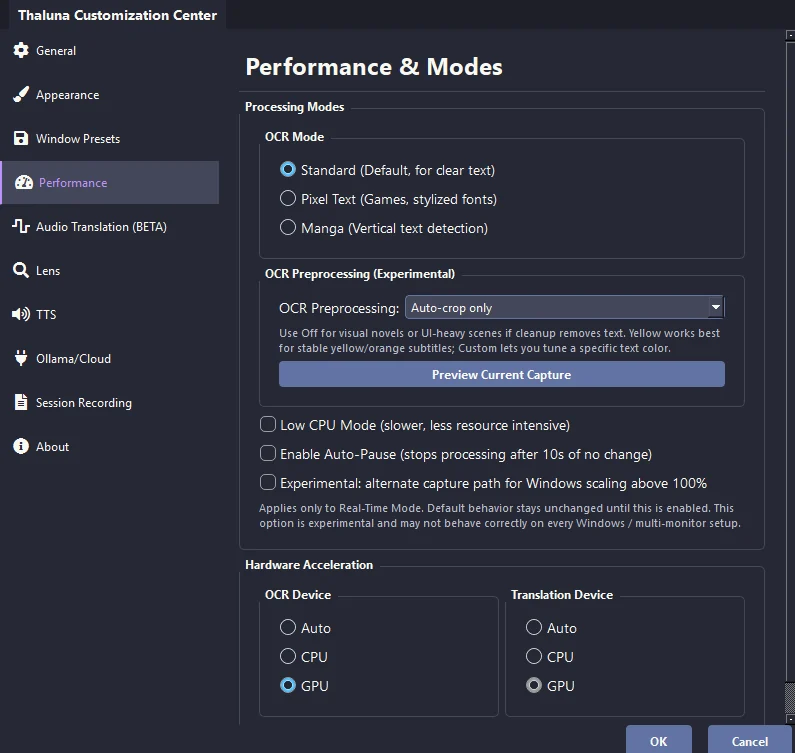
Standard works for most cases, Pixel Text improves game-font detection, and Manga mode targets harder vertical Japanese layouts in real-time mode.
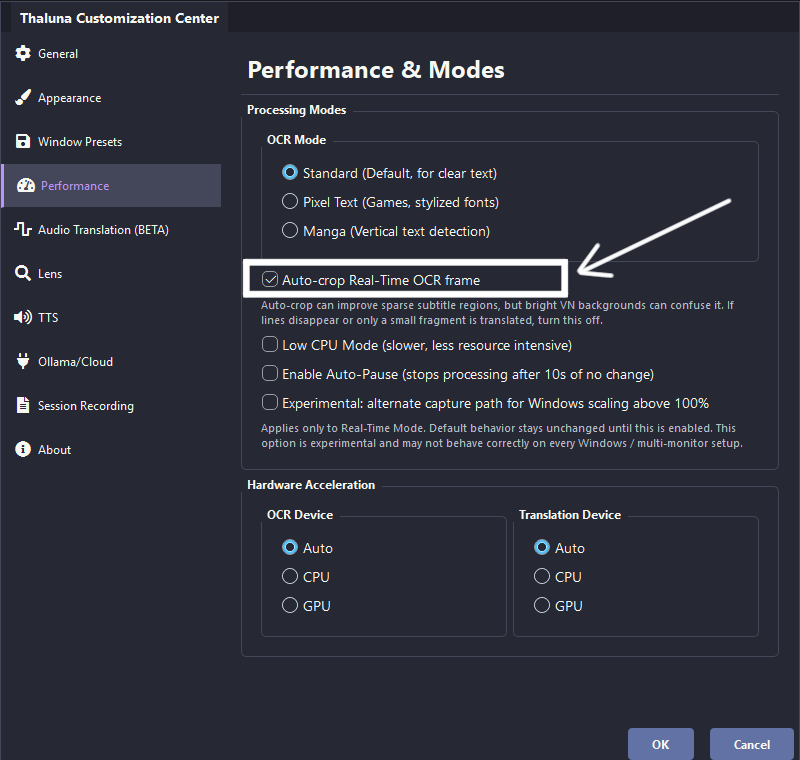
Enable auto-crop when the capture area is larger than the subtitle line and empty margins make OCR less reliable. Disable it for bright visual novel backgrounds or carefully tuned manual regions.
Use Off, Auto-crop only, Light subtitles, Yellow subtitles, or Custom color depending on what the current game, anime, manga page, or video subtitle style needs.
Reduces OCR refresh pressure for weaker systems or when you are running other heavy applications.
Pauses OCR after static text remains unchanged for a while, helping reduce unnecessary CPU usage.
Choose Auto, CPU, or GPU for OCR recognition.
Choose Auto, CPU, or GPU for built-in local translation models. This does not affect Ollama or OpenRouter, which run externally.
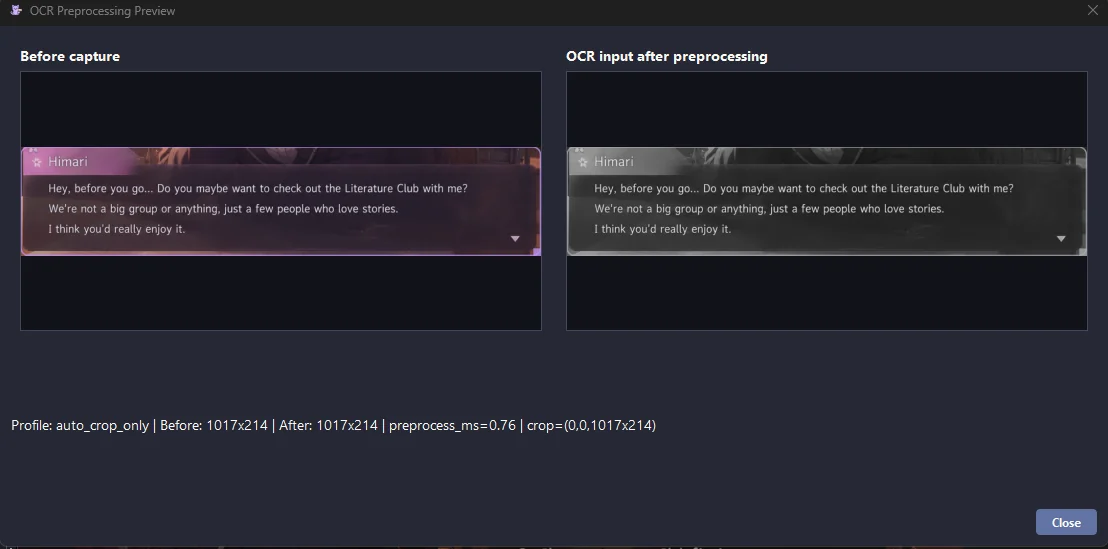
Use Preview Current Capture when tuning these profiles. It shows the processed OCR image so you are not guessing only from translation output.
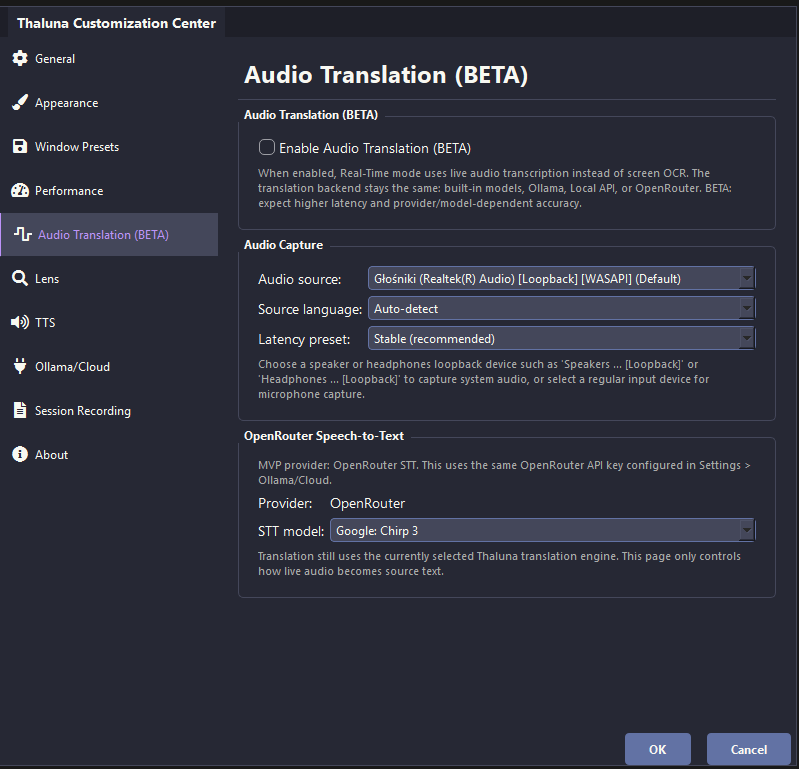
Audio Translation lets Real-Time mode use live system audio transcription instead of screen OCR. It is useful for anime, videos, streams, voice-acted visual novels, and situations where subtitles are unavailable or hard for OCR to read.
Beta note: speech recognition quality depends on source audio, background music, overlapping voices, source language, selected STT model, translation backend, and audio device configuration.
Select a proper loopback device such as Speakers or Headphones loopback so Thaluna can hear the application audio.
Audio Translation uses OpenRouter Speech-to-Text, so you need a valid OpenRouter API key, available credits, and a supported STT model.
Choose the source language when possible. Auto-detection can work, but explicit language selection is usually more stable for anime and voiced content.
Use the Stable preset first. Lower-latency modes can feel faster, but they may produce more unstable partial transcripts.
If audio activity is detected but no text appears, raise the source application or system volume and verify that the selected loopback device is the one actually playing audio.
The STT step only creates source text. The final translation still uses your selected backend: built-in models, Ollama, Custom Local API, or OpenRouter translation.
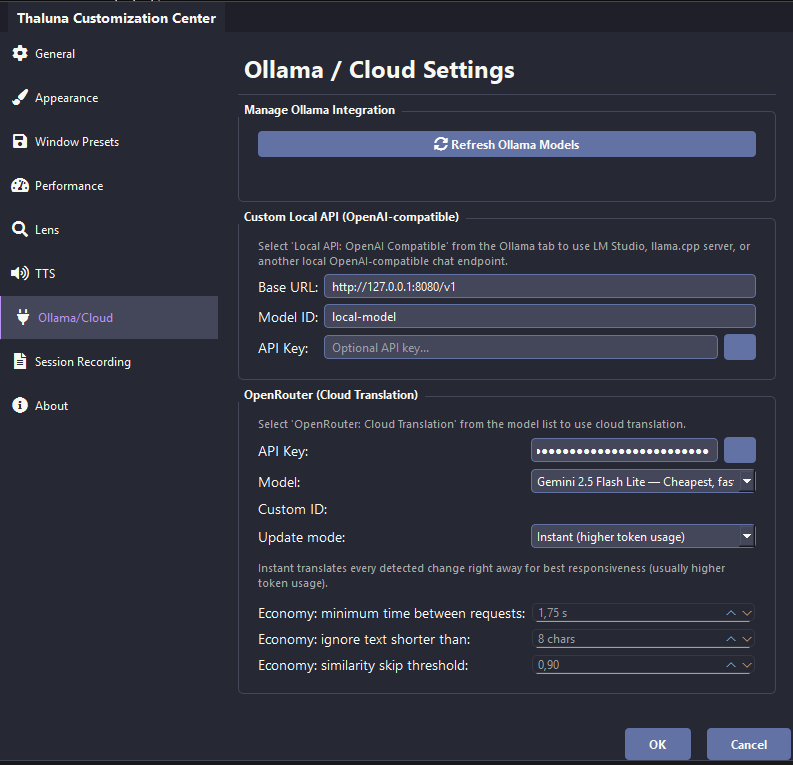
Refresh the list of available local Ollama models after starting Ollama or downloading new ones.
Set the base URL for an OpenAI-compatible local server, usually http://127.0.0.1:8080/v1, and keep the model ID matching your server setup.
Only fill this if your local endpoint requires one. Most localhost llama.cpp setups can leave it empty.
Paste your OpenRouter API key carefully, with no extra spaces, and keep it private.
Choose the OpenRouter model used for translation. Models differ in speed, cost, and quality.
Manually specify a model ID when you want to use something not listed in the dropdown.
Instant gives the fastest cloud responsiveness, while Economy reduces request frequency to save tokens.
Adjust request timing, ignore very short text, and skip highly similar OCR lines to reduce unnecessary API usage.
When you select an Ollama model, the first translation can take longer because Ollama often loads the model only after Thaluna sends the first OCR text line. During that warm-up, Thaluna may look like it is not showing anything yet. Wait for the first response; later lines are usually faster once the model is loaded.
http://127.0.0.1:8080/v14096-81920.1-0.3512-2048Example: llama-server -m model.gguf --port 8080 --ctx-size 8192
Thaluna sends short OCR translation requests, so very large context windows are usually not needed. If a model generates very long nonsense responses, lower temperature or set a stricter max token limit in your local server/client configuration.
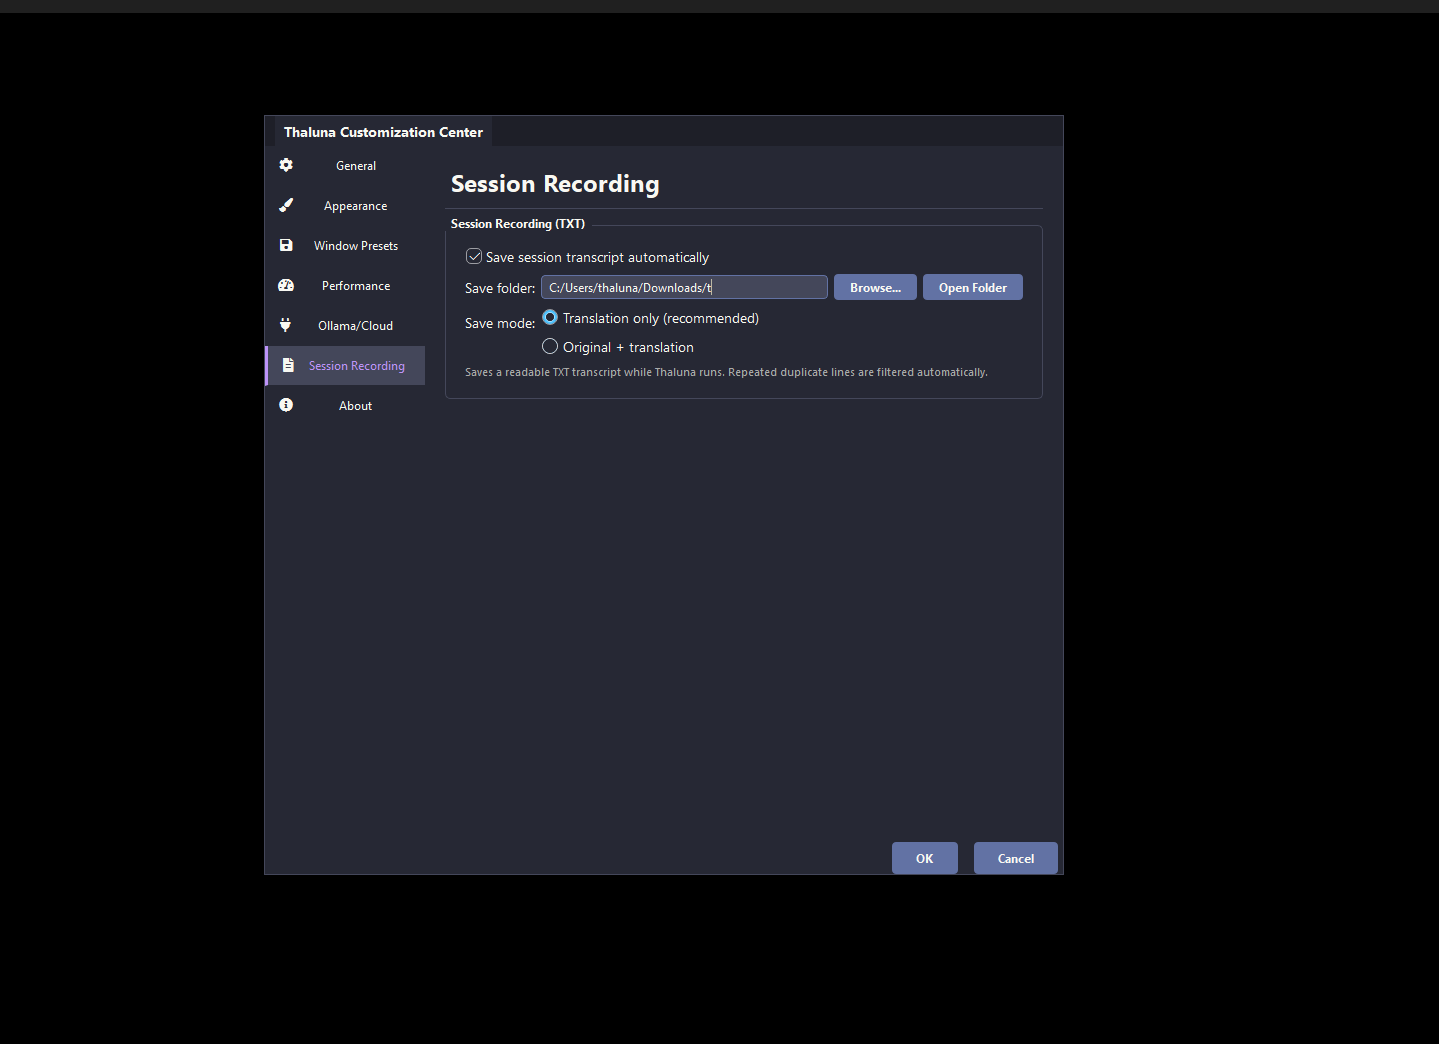
Enable or disable automatic transcript recording for the current session.
Choose where the TXT transcript files should be written.
Choose between translation-only output or original-plus-translation output.
Repeated duplicate lines are filtered to keep the transcript readable over long sessions.
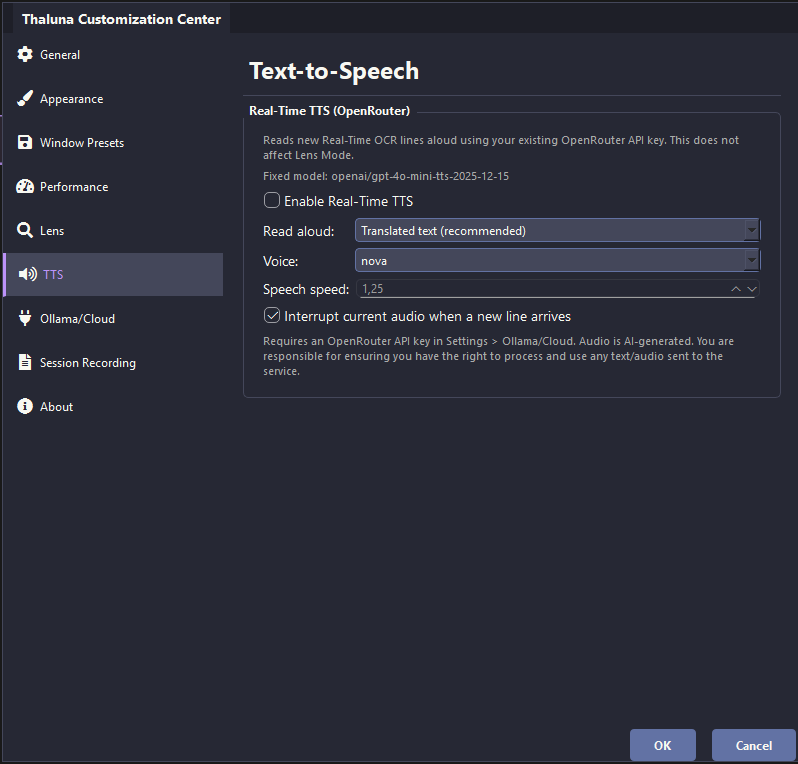
Real-Time TTS is optional and does not affect the rest of Thaluna if you leave it disabled.
Choose whether TTS reads translated text or the original OCR text.
Select a supported voice from the list and adjust speech speed to fit your preference.
TTS uses your configured OpenRouter API key. Audio is AI-generated, and you are responsible for the text you choose to send.
If you only need one specific part of the workflow, use the dedicated guides for Local API setup, OpenRouter setup, display scaling, hardware compatibility, or the changelog.